Sensory Bags
Sensory Bags are a great activity for action words (splash, press, jiggle) and describing words (cold, wet, sparkly).
There are several different ways you can make a sensory bag. Here are some useful tips when making some:
- Super short nails on your little one
- Don’t overfill the bag – a small amount of liquid is all you’ll need
- Remove all the air from the bag that you can
- Tape across the top and tape all the side down
- Silicone Zip Lock bags can also be used and purchased from Kmart
--------
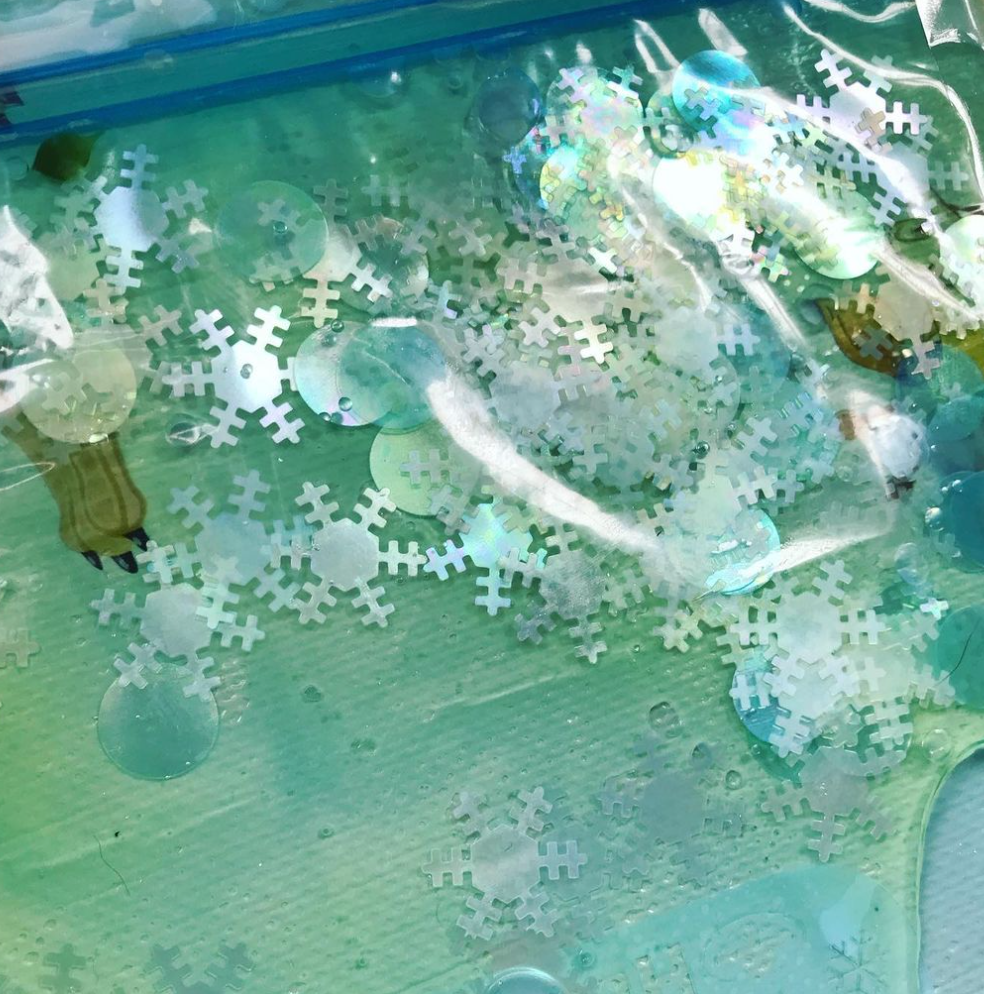
Festive Sensory Bag
August made a beeline for this bag as soon as he saw it! They're so incredibly easy to make, so I like to whip one or two up every few days and rotate them into play to keep August (6mo) interested. We added some festive snowflakes to to this one to get into the Christmas spirit, but you can pretty much add anything.
What you'll need:
⋒ A ziplock bag (good quality, double zips if possible)
⋒ A liquid. Think water, soap, glue, hair gel, honey?!
⋒ Small objects. (Make sure they're not sharp).
⋒ Food colouring optional.
⋒ Some heavy duty packing tape or wide selotape.
How to:
Simply add your small items to the ziplock bag and add your liquid. You really don't need a lot of liquid (think less than 1/4 of the bag) as you don't want it to be bulging when you lie it flat. Add some food colouring and slowly close the bag, pushing out as much air as possible. I use some tape to secure the top a little more, then tape all four sides to a smooth play surface.
--------
Flower Forage Sensory Bag

We had SO MUCH FUN today exploring our friend's beautiful garden. This was a two part activity that kept us busy for the afternoon - who doesn't love exploring a garden? We looked for different coloured flowers, picked them and put them in a container (hello - posting activity!). There were so many teachable moments and rich language going on, from colours to sizes to texture to what you can and can't eat. August loved feeling the flowers and tasting them!
We brought them back and put them into a ziplock bag with some water and taped them to the window so the light could shine through and show all the bright colours. Another one we added clear laundry liquid to which also made for a great texture to push the petals around.
This is such a great activity regardless of whether you make a sensory bag at the end - it was sensory enough just picking flowers! .
--------
Oil Painting Sensory Bag

You can't go wrong with a sensory bag! We're using our silicone reusable ones from kmart but any ziplock bag will do. For this one we've added a few squirts of acrylic paint and and then added baby oil. Acrylic paint is water based which means it doesn't mix in with the oil - so you can swish is around with your fingers to paint. The paint colours end up mixing together in the end but never mixes with the oil so this activity will last a while!
--------
Icey Sensory Bag (ice ice baby)
It couldn't be any easier. I put some ice in a ziplock bag and gave it to August. It was a brilliant opportunity to talk about things feeling cold - we'd already talked about 'hot' when he was super interested in my cup of tea this morning!
As usual he enjoyed scrunching and mouthing the bag - with the added bonus that the ice probably soothed his little teething gums more than any other sensory bag. I know that when it melts he'll enjoy it just as much - it's surprising how interesting a bag of water is to a baby!
Lovely language opportunities with this - I modelled the word 'cold' every time he was touching the ice specifically. I also touched it myself and modelled an over the top reaction to being cold - ''Wow the ice is cold! It's made my fingers very cold! I need to put my coat on!''. Later I took him to the fridge/freezer and opened the door to talk about the cold feeling in there. I showed him where the ice came from and we added a piece to the bag.


No comments